No chapters found. Try another word or clear your search.
Your first recording in 10 minutes
Recording for the first time? Start with these six steps, then read about the room, equipment and phone recording. Preparing a handoff? Use the sections on takes, software, formats and uploading. Troubleshooting, a checklist, templates and a glossary are available below.
- Find quiet. Close the window and remove noise sources. Choose a room with curtains, clothes or upholstered furniture.
- Secure the device. Keep the microphone or phone still. Do not hold it or tap the table.
- Make a test. Record 30–60 seconds with normal and loud lines, followed by 10 seconds of room sound.
- Check with headphones. Every word should be clear, without crackling, echo or cut-off endings. Computer peaks should be around −12 to −6 dBFS. If the phone does not display dBFS, record a loud line and increase the distance if it distorts or crackles.
- Save the original. No music or effects. Make a copy before fixing anything.
- Send the test. Name the file, identify the role and scene, and agree the sound with the sound engineer before recording a large amount.
A usable recording preserves consonants, word endings and quiet lines; keeps room, distance and settings consistent across scenes; retains natural breath, tone and acting dynamics; and has no prominent unrelated sounds in pauses.
Proposed main profile: WAV PCM, 48 kHz, 24-bit, mono for one voice, without effects. An accessible alternative is WAV 44.1 or 48 kHz / 16-bit; on a phone, the original M4A, preferably lossless if selectable. Send a test first. Priorities: performance and room → correct input level → preserved original → format. Buying equipment is not the first step.
Prepare a quiet room
Choose the quietest time. Close windows and the door; temporarily turn off fans and noisy appliances where possible. Heavy curtains, a carpet, clothes and soft furniture reduce reflections. Avoid bathrooms and empty kitchens.
Move away from bare walls and corners. Put a soft surface behind you to reduce reflected sound returning to the microphone. Blankets reduce reflections but do not isolate street or neighbour noise. Keep computer ventilation clear.
- Move a laptop with a fan away; do not aim the microphone at a keyboard or window.
- Remove jangling jewellery and clocks; do not turn paper pages during a line.
- Place the text at eye level so you do not keep turning between it and the microphone.
- Test two positions and compare through the same headphones: household noise can become apparent only in a recording.
Choose equipment and placement
Three accessible setups
- Phone: built-in microphone, stable stand, quiet room, free storage, battery charge and a way to save the original file. Compare its microphone with any headset you own; an external headset is not automatically better.
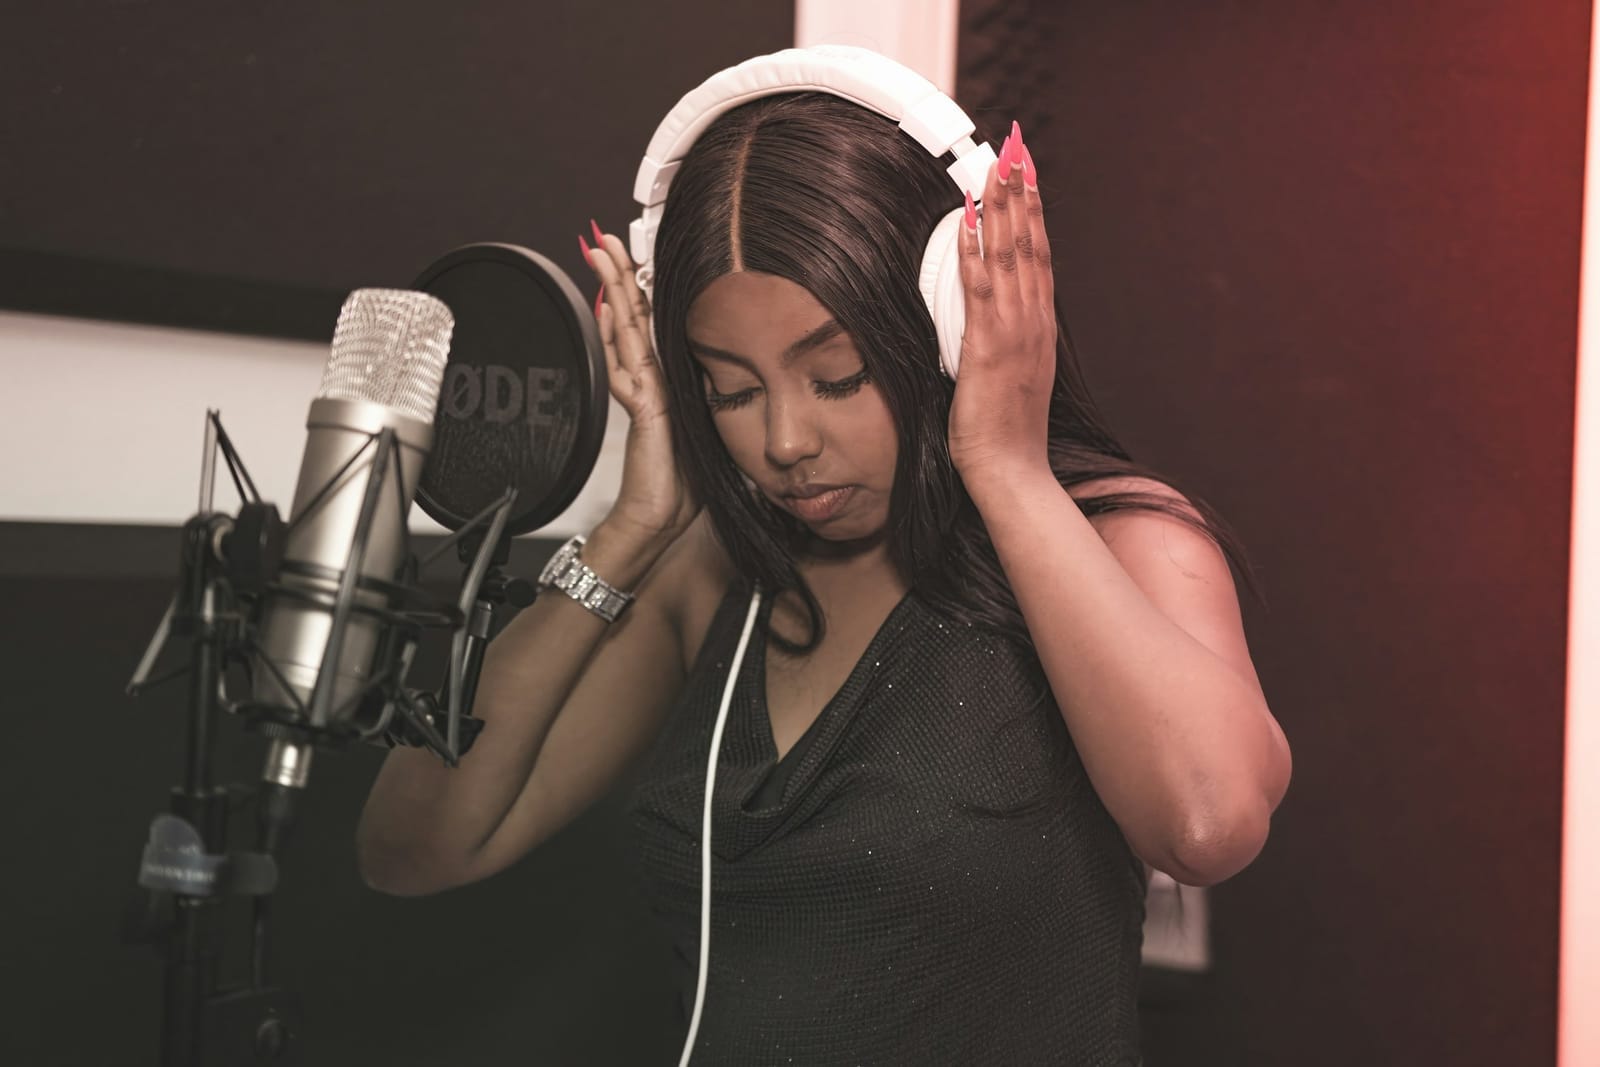
- USB microphone: connects directly to the computer. Use a stand, pop filter and wired headphones. Confirm the application records the USB microphone rather than the laptop. A dynamic microphone also hears the room; microphone type does not replace good placement.
- XLR + interface: suitable if you own the equipment or need an expandable setup. Connect the microphone to the audio interface and the interface to the computer; adjust input gain on the interface. Enable 48 V only according to the microphone instructions: not every model needs it.
Useful first purchases are a stable stand, pop filter and comfortable closed-back headphones, followed by equipment suited to your room. Upgrade after a test recording.
Starting distances for testing
Microphone: 15–20 cm. Position the capsule slightly outside the airflow, at roughly 20°, with a pop filter between mouth and microphone. Speak into its intended side: a side grille or end, depending on the model. Check its manual.
Phone: 20–30 cm. Aim the microphone being used towards you without blocking it with the case or stand; move it slightly out of the direct breath. Further away means more room sound; too close means plosive p/b sounds, breath and overload. Compare two tests. These distances are starting points, not fixed rules. Reduce gain and retest before a loud scene.
Set computer input and level
Audacity is the main route in this guide. Menu labels depend on version and language.
- Select the correct Recording Device. For one microphone, choose 1 channel / Mono.
- If supported, set 48,000 Hz and match the sample rate in the software and device settings. Recording bit depth depends on the hardware.
- Disable system voice enhancements, automatic level control and echo effects where possible. Listen on headphones.
- Before recording, enable input monitoring and perform the loudest line. Reduce Gain / input gain until sufficient headroom remains.
Aim for peaks around −12 to −6 dBFS; leave more headroom for shouting if needed. Do not try to fill the entire meter. 0 dBFS is the digital ceiling. Headphone volume changes playback, not the recorded input. Turning down an already distorted recording cannot restore the signal.
Record and agree a test
- State your role and settings, then leave a 2-second pause.
- Read 20 seconds normally and 10 seconds with the scene’s loudest emotion.
- Add a quiet line and words with p, b, s and sh sounds.
- Record 10–20 seconds of room sound without moving.
Note the date, device, distance and input gain for future sessions. Listen on headphones at normal volume for distortion, hum, echo, whistling, rustling or missing endings. Compare alternatives at similar volume: louder does not necessarily mean better.
Send the test to the person responsible for sound. If something interferes, change one condition at a time and record another short test. Room tone is the actual room sound: keep your posture and settings, and do not replace it with digital silence. A short test before a long scene can save hours of rerecording.
Prepare your phone
- Free storage, charge the device and enable Do Not Disturb. Airplane mode is an option for offline recording.
- Use a stable support. Do not hold the phone, touch the table or cover the microphone.
- Check recording continues while your text is open or the screen is locked. Do not play audio from other applications.
A USB-C or Lightning connector alone does not guarantee compatibility. The microphone or adapter must support audio input on your particular phone. Make a short test to confirm that the external microphone is actually being used.
Wired headphones are more convenient for monitoring. Bluetooth may switch the input to the headset and introduce latency: test it. If the application automatically adjusts gain or processes sound, disclose this at handoff and keep the file as recorded.
iPhone: record in Voice Memos
Start with the built-in Voice Memos application. Available settings vary across iOS versions.
- Select mono in its settings if available. Spatial recording is unnecessary for one voice.
- If quality is selectable, use Lossless. Disable recording enhancement and voice isolation for the original where possible.
- Make a test, then record the scene. Voice Memos often requires adjusting distance rather than a Gain control.
- Select and clearly name the recording. Open More → Share → Save to Files and choose a folder. In the Apple guide cited by the source document, standard export is M4A.
- Open the saved file and check its beginning, end and duration. Keep the recording in Voice Memos as well.
If the project needs WAV, send the original to the sound engineer or agree a separate conversion. Renaming .m4a to .wav does not work. M4A is a container: it can contain AAC or ALAC; the extension alone does not reveal whether lossy compression was used.
Android: record in Lexis Audio Editor
The source guide offers Lexis as an Android option with free WAV saving. Install through the developer’s website link; available features may change.
- Allow microphone access. Find recording settings; select mono and 48,000 Hz if available.
- Lexis lists WAV as 16-bit PCM. Record at the available 16-bit depth; there is no need to increase it after recording.
- Leave effects off. Test loud lines for crackling, then record the scene.
- Save as WAV, give the file a name and select an accessible folder. Locate it in the file manager and listen.
- Send the actual file. If using Share, check the received format: an application or service may change it.
If Lexis is unsuitable, use the native recorder at its best available quality and preserve the original. Not all phones expose sample rate or manual gain. Assess the audible result before changing equipment to meet numbers.
Transfer the file without losses
Transfer the recording as a file while preserving its contents and original format. First save the audio to device storage, then copy via cable, AirDrop or a cloud folder. In a messenger, send a document / file: voice messages or forwarding through an audio player may produce a different recording version.
After copying, compare filename, duration and size; open it on the receiving device. If WAV is needed, keep the original M4A, AAC or other file and create a separate converted copy. Increasing sample rate or bit depth cannot recover details lost through compression. Avoid conversion chains such as MP3 → M4A → MP3.
If the editor cannot open the recording, agree a way to transfer the original. Keep at least two copies: on the device and in another folder or cloud storage. Delete originals only after receipt is confirmed.
Takes, remote sessions and pickups
During a scene
Confirm the script version, role and boundaries. One file contains an agreed scene or block, not necessarily each individual line. Before a large session, agree whole scenes versus lines, whether every take is needed and who performs the first edit.
After a mistake, pause for 2–3 seconds and repeat the full sentence. Leave 1–2 seconds before the first and after the last line. Preserve natural breaths and acting pauses. Record a new interpretation as a separate T02; retain a successful T01 until the director decides.
Photograph the microphone position and note gain, distance, room and input. When replacing a line, include the preceding and following sentences to preserve pace and tone and make editing easier.
Recording together remotely
Each participant records their own voice locally and listens to partners on headphones. Everyone uses the same script version. Make a shared start sync marker if the sound engineer requests one. Do not cut pauses in local originals that will be aligned with other tracks. The call recording can serve as a reference.
Corrections
Obtain the exact text and timecode. Restore the room, position and settings; listen to the adjacent old passage first. Record the new line with context and pauses at both ends. Deliver a separate take identifying what it replaces. Report changed conditions before editing. Adjust speed, pitch or synchronisation yourself only by agreement with the director and sound engineer.
Software, RAW and initial editing
Choose one application
- Audacity: this guide’s main route for recording, editing, noise reduction and WAV export. Free, open source; Windows, macOS and Linux.
- ocenaudio: a free alternative for recording and simple single-file editing on Windows, macOS and Linux. Effect settings differ from Audacity.
- Voice Memos / iPhone: built-in recording and export to Files. Keep the original recording.
- Lexis / Android: WAV 16-bit PCM. Developer help cited in the source says the free Android version saves WAV; paid options may change.
Download from official websites. Detailed procedures below concern Audacity; menu labels can differ.
Keep the original intact
Immediately save the file in RAW. Here, RAW means the recording before your own processing. Do not overwrite it with effects, normalisation or editing. Disclose automatic phone processing; do not try to undo it with another effect. Edit a copy. An editor project is useful but does not replace the original audio file.
By agreement, a copy may have failed repetitions, a long introduction or unrelated sounds between lines removed. Preserve word beginnings and endings, breaths and meaningful pauses; do not turn all gaps into digital silence. For an edit click, try a short edge fade of about 5–10 ms without affecting speech, then listen across the entire join. Do not move lines in time in synchronised multitrack recordings without agreement.
Three versions: RAW, CLEAN, LISTEN
These are starting recipes for copies, not compulsory processing for every recording.
| Type | Contents and purpose |
|---|---|
| RAW | Main material, without EQ, noise reduction, compression, gate, music or reverb. Preserve original level, pauses and dynamics. Original format or agreed WAV. Best when the sound engineer will handle processing. |
| CLEAN | Only for a problem, on a copy: low hum — 70 Hz filter at 12 dB/octave; steady hiss — light noise reduction starting at 3 dB. Apply only the effect needed. Deliver with RAW and a list of changes. |
| LISTEN | Optional listening copy: if necessary, after light cleaning apply gentle 2:1 compression, then peak-normalise to −3 dBFS. Never the only original. Final production loudness is set during mixing. |
If consonants disappear, tone changes or bubbling artefacts appear, return to RAW. When needed, noise reduction comes before compression. The original needs no gate, make-it-louder limiter, music or reverb.
Light noise reduction in Audacity
For relatively constant noise, such as steady hiss, only. Work on a copy.
- Select 1–3 seconds of noise with no voice, breathing or movement.
- Open Noise Reduction → Get Noise Profile.
- Select the required recording. Initial trial: Reduction 3 dB; Sensitivity 6; Smoothing 3 bands.
- Use Preview. Compare speech and pauses before and after. Undo the effect if unnecessary.
If available, use Residue to listen to what is removed. Intelligible speech in the residue is a reason to reduce processing. Metallic sound, bubbling, missing endings and unnatural pauses indicate excessive intervention.
This preset cannot fix knocks, barking, neighbours talking or strong echo. Rerecording under different conditions is often better. 3 / 6 / 3 is this guide’s cautious starting point, not a factory preset or guarantee.
Filter, compressor and copy level
CLEAN: only for low hum
For a high-pass filter, start at 70 Hz with a 12 dB/octave slope to reduce low hum and vibration. Compare with RAW. If the voice becomes thin or loses needed low frequencies, lower the cutoff or disable the filter. Leave other EQ bands unboosted; do not add bass or air as a universal recipe.
LISTEN: gentle levelling
Compressor: Ratio 2:1; Threshold initially −18 dB; Attack 10 ms; Release 100 ms; Knee 6 dB if available; Makeup 0 dB / automatic makeup off. Adjust threshold so mainly loud phrases are reduced by about 2–3 dB. Without a meter, compare by ear and avoid heavy processing.
At the end, if needed, Normalize: peak −3 dBFS. This is a peak target, not a LUFS loudness target. These settings are for CLEAN or LISTEN, never the only original. Final publication loudness is set in the mix.
Formats and WAV export
- WAV PCM: preferred for a new computer session: 48 kHz, 24-bit, mono. No lossy compression; one voice generally does not need stereo.
- 44.1 kHz / 16-bit: a good original can be usable. Changing 16 → 24-bit adds no original detail. Preserve source settings unless the sound engineer asks otherwise.
- Other formats: proposed acceptance includes FLAC and original M4A (AAC / ALAC). MP3 is for demos or existing originals by agreement. Prefer WAV or the phone’s native format for new recordings.
- AUP3: an Audacity project, not a finished audio file. Export is required. Internal 32-bit float processing cannot rescue an overloaded microphone or input.
If a phone recorded stereo, keep it. Do not blindly sum channels: the sound engineer can select a channel or convert to mono.
Export in Audacity
- Check tracks and time range. Exclude music, prompts and other voices.
- Choose File → Export Audio and save to your computer. Menu wording may differ.
- Select WAV; for one mono track, Mono. For a new agreed session: 48,000 Hz, Signed 24-bit PCM. Preserve 44.1 kHz / 16-bit when those are the original settings.
- Reopen the exported file. Listen to the beginning, end and edits; ensure it is not empty or cut short. Check duration, sample rate, bit depth and channel count.
Export RAW from unprocessed material. Save processed copies separately as CLEAN or LISTEN. Saving an editor project and exporting audio are different actions. If WAV fails to upload, check the form and agree a handoff; do not choose MP3 merely for size.
Filenames and delivery package
Use the project’s existing convention. This recommended scheme may be simplified by agreement:
CC_RU_SC018_SV04_Narrator_Andrew_T02_RAW.wavCC = Copper City project; RU = language; SC018 = scene 18; SV04 = script version four; Narrator = role; Andrew = agreed participant ID; T02 = second performance take; RAW = original. Script versions and performance takes are different.
Latin letters, digits and underscores are a compatibility recommendation, not an established BENARI restriction. New take: T03_RAW.wav. New processing of the same take: T02_CLEAN_v02.wav. Room tone: CC_RU_Andrew_20261021_ROOMTONE.wav. Avoid final_newest, double extensions and other people’s full names unless needed.
RAW/— originals without your processing.CLEAN/— prepared copies only by agreement.LISTEN/— optional listening copies.ROOMTONE/— 10–20 seconds of room sound per session.README.txt— role, scenes, script version, equipment, settings, processing and notes. Do not duplicate unnecessary versions.
Proposed limit: 1 GB (1000 MB) per file. It is not a confirmed live setting: follow the current form. A convenient block is 5–15 minutes, a recommendation rather than a duration limit. WAV 48 kHz / 24-bit / mono is about 8.6 MB/minute, or about 130 MB for 15 minutes; stereo is roughly twice that.
Do not compress originals to MP3 for uploading. Keep copies in two places until receipt is confirmed. With a weak connection, send agreed scenes as separate files. Agree ZIP files and large sessions separately.
Upload to your project
Open the BENARI studio.
- Sign in and open your project through My Projects or In Production.
- Find the assigned task or Materials section. Confirm the project, scene and role.
- Add the file through the available uploader. Target standard: WAV PCM / FLAC / M4A; MP3 for a demo or existing original. The proposed limit is 1 GB; check the current form.
- Describe the role, scene, take, script version and RAW / CLEAN / LISTEN type. Disclose effects and problem areas.
- Wait for transfer to finish. Do not close the page while an upload indicator remains.
- Check filename and duration; listen to the preview if available. Submit for review using the method in the task.
This is a proposed standard, not confirmation of the application’s current capabilities. If a format is rejected, agree transfer of the original with the producer. Team context: audio theatre guide, producer’s room, audio theatre.
If the sound or file goes wrong
Check the original and the recording cause first. Change one condition at a time, followed by a short test.
| Problem | What to check |
|---|---|
| Distortion or crackles on loud words | Lower gain before recording; increase distance on a phone. Rerecord affected lines. If crackling is unrelated to loudness, check the cable and input. |
| Echo or bathroom-like voice | Use a softer room with fewer bare reflective surfaces; move closer without overload. Strong echo is best addressed by rerecording. |
| Plosive p/b impacts | Pop filter, slight movement out of direct breath, consistent distance. Rerecord the line; do not cut away the consonant with the impact. |
| Hum, hiss or street noise | Remove the source or change place or time. Check the laptop is not recording instead of the microphone. Mild constant background may be reduced on a copy. |
| Too quiet | Distinguish headphone level from recording level. Increase input gain with headroom for the next recording. Amplifying a finished file also amplifies noise; send a test to a specialist. |
| Metallic sound or missing endings | Disable noise reduction, gate and enhancements; return to RAW. Try another mode or application if processing is built in. |
| One channel, wrong speed or pitch | For one microphone, check mono input. For altered speed or pitch, check device and project sample rates. Do not guess tempo corrections; preserve the original. |
| Will not open or upload | Check export completion, size, extension, actual internal format and form rules. Do not rename M4A to WAV. If it fails again, report the error text and file settings. |
For help, attach 20–30 seconds of the problematic original, the application and device names, and when the error occurs. A voice with mild background noise is often more useful than aggressive cleaning that removes endings: send RAW and a short problem description.
Checklist and ready-to-copy templates
Check the exported file once for every session.
- All words, quiet lines and endings are audible.
- No distortion, crackling, microphone knocks or strong echo.
- Breathing and meaningful pauses remain.
- No accidental music, prompts or partners’ voices.
- The test and main settings are agreed with the sound engineer.
- RAW is stored separately with a backup.
- The name includes project, scene, role and take.
- The file opens; beginning, end and duration are checked.
- The format meets project and upload-form requirements.
- Effects, script version and useful notes are stated.
- The correct uploaded file has been checked.
If you cannot meet an item, say so when sending the test. The guide helps beginners deliver usable material; it is not a barrier to participation.
README.txt
Project: Copper City (CC)
Role / participant: Narrator / Andrew
Scene / script: SC018 / SV04
Date: 2026-10-21; take: T02
Device: USB microphone, specify model
Format: WAV PCM, 48 kHz, 24-bit, mono
RAW: no self-applied processing
CLEAN: list effects if attached
Note: line repeated at 00:42; second version after a pause
Upload comment
SC018, Narrator, SV04, take T02. RAW attached. Repeated line at 00:42 retained in the original. Room tone in a separate file. Please check before I record the remaining scenes.
Your session preset
Room and time: …
Device position: …; distance: …
Input: …; gain: …
Sample rate / bit depth: …; test filename: …
Replace examples with your details. Include facts that help listening and editing.
Glossary and guide sources
- Gain: input amplification before recording.
- dBFS: digital level scale; 0 is the ceiling and negative values are below it. Clipping is overload that distorts the signal.
- kHz: sample rate; 48 kHz means 48,000 samples per second.
- Bit depth: sample representation precision; 24-bit does not mean louder.
- Mono: one channel, normally heard in both headphone ears.
- PCM: a way to store digital audio; WAV PCM has no lossy compression.
- RAW / CLEAN / LISTEN: original before your processing / cleaned copy / listening copy.
- Room tone: room sound without speech or movement.
- Normalisation: adjusts the whole file to a selected target; peak normalisation does not level every phrase.
- Compressor: reduces differences in level. Export creates an audio file from an editor project.
- LUFS: perceived loudness. Do not independently impose final publication loudness requirements on an actor’s original.
The source guide marks these official developer and microphone-manufacturer instructions as checked on 21 October 2026. This web edition preserves that edition’s information.
- Audacity: recording and channels.
- Audacity: meters and overload.
- Shure: Microphone Techniques and placement.
- Apple: recording in Voice Memos.
- Apple: export to Files.
- Lexis: features and formats.
- Lexis: saving on Android.
- Audacity: official website.
- ocenaudio: official website.
- Audacity: noise reduction.
- Audacity: high-pass filter.
- Audacity: compressor.
- Audacity: peak normalisation.
- Audacity: WAV export.
- Audacity: project and audio export.
- Audacity: recording troubleshooting.
Start with a short test, preserve the natural voice and give the team material from which a production can grow.